Clarinet Care & Maintenance Guide


Close-up of a Yamaha Clarinet
 

An Easy Guide to Clarinet Care & Maintenance

Most musical instruments require and benefit from regular care maintenance; look after your instrument and you'll be rewarded with optimal response and performance each time you practise or perform.

The clarinet is no exception. Carefully formed either from ABS resin or crafted from select tonewoods (or, in the case of our Duet+ models, a combination of both), the clarinet has an array of keys to precisely control the air moving within the body. Here's an easy guide to looking after your clarinet, followed by some recommended essentials to help you.

Contents:

  1. The different parts of a clarinet
  2. Before you play...
  3. After practising & performing - moisture removal
  4. Monthly maintenance
  5. Yearly Servicing


The Different Parts of a Clarinet

The different sections of a Bb Clarinet

Most clarinet students begin to learn using a Bb clarinet which has 5 main sections:

  • The mouthpiece, which includes a wooden reed clamped over the air hole by a (usually) metal ligature. By blowing onto the reed with a specific mouth shape, you can make it vibrate which in turn makes the air within the clarinet vibrate - thus creating sound. Our mouthpieces are available in either ABS resin or ebonite with a range of sizes; a good 'all-round' mouthpiece is usually included with our clarinets.
  • The barrel, which the mouthpiece connects to on an A, Bb or Eb clarinet; on alto and bass clarinets, the barrel is replaced by the neck - a curved, metal tube to extend the overall length of the instrument and increase the tone's presence and power.
  • The upper tube, which hosts some of the keys and their associated arms and levers.
  • The lower tube which holds the remaining keys, arms and levers; some key components connect between the two tubes (making accurate positioning vital not just for good finger position but for key functionality).
  • The bell at the far end of the instrument; this is usually a simple bell-shape on Bb clarinets (and is made of the same wood or resin as the main body of the instrument). On our alto and bass clarinets, the bell is usually longer, curved upwards and made of selected metals to give a wider note range and increased projection; it also includes a pad plate key.

Most student-level clarinets are formed using ABS resin; this is hard-wearing, incredibly strong and gives a very consistent response - particularly useful for students learning their craft. Our professional and custom clarinets are usually crafted from grenadilla, a tonewood which gives exceptional warmth and richness to the sound but, as with all tonewoods, needs more careful handling and is more susceptible to ambient temperature and humidity changes.

Our Duet+ clarinets use a combination of the two; the body is crafted from grenadilla for a warm tone but the internal airway is fitted with a layer of resin - making the clarinet more consistent in response and tolerant of temperature changes during performances (which might otherwise affect the clarinet's tuning).


Before you play...

Hand & Mouth Hygiene

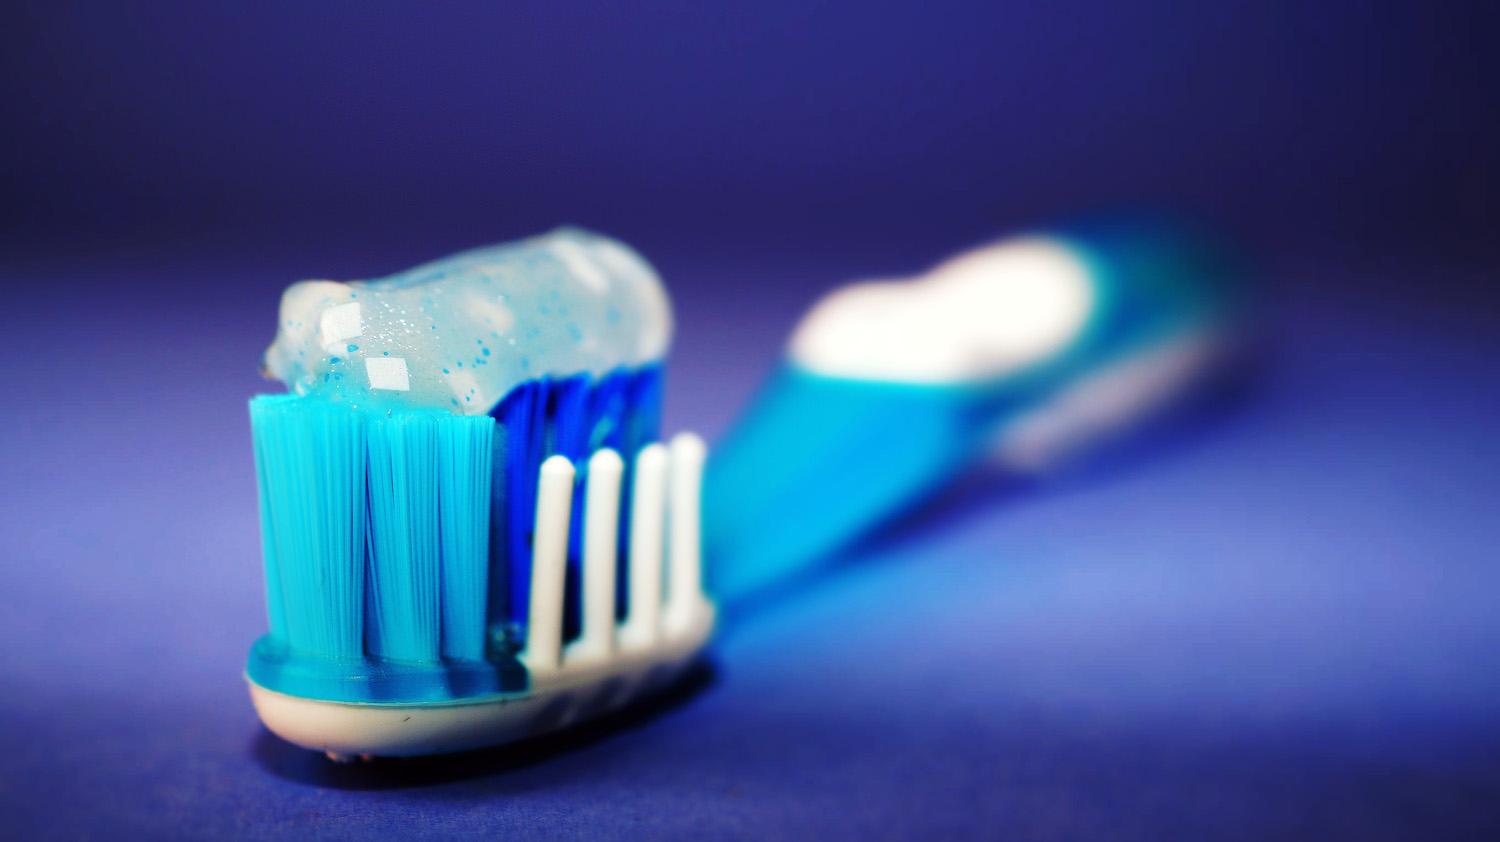
Before playing, it's important to make sure your hands, face and teeth are clean; any residue on your skin can be detrimental to the clarinet's keys and body, whilst any food debris present in the mouth can easily find its way into the clarinet itself - which could block the airway and cause mould to grow.

Close-up of a toothbrush with toothpaste
 

Conditioning a Brand New Wooden Clarinet

Wooden clarinets, such as our Professional and Custom models, give a beautifully warm and rich tone. Unlike ABS resin instruments, wooden clarinets require conditioning when brand new in order to regulate the moisture absorption of the tonewood.

As tempting as it may be, if you immediately play a brand new wooden clarinet for a long period of time, the newly crafted tonewood body will quickly absorb any moisture making its way from your breath through the mouthpiece. As a result, the body can begin to swell - potentially deforming the clarinet and, in severe cases, causing it to split and break.

To protect against this, you can 'condition' wooden clarinets by playing for a maximum of 15 minutes each day for the first week, so that the body can only absorb a limited amount of moisture - and which, to a point, decreases its absorption factor. If at any point the clarinet's tone changes and it seems as though the air channel has become blocked, stop playing immediately to remove moisture from the body.

After the first week of conditioning, gradually increase the amount of time each day that you play the clarinet.

Egg Timer/Hourglass
 

Room Temperature & Humidity

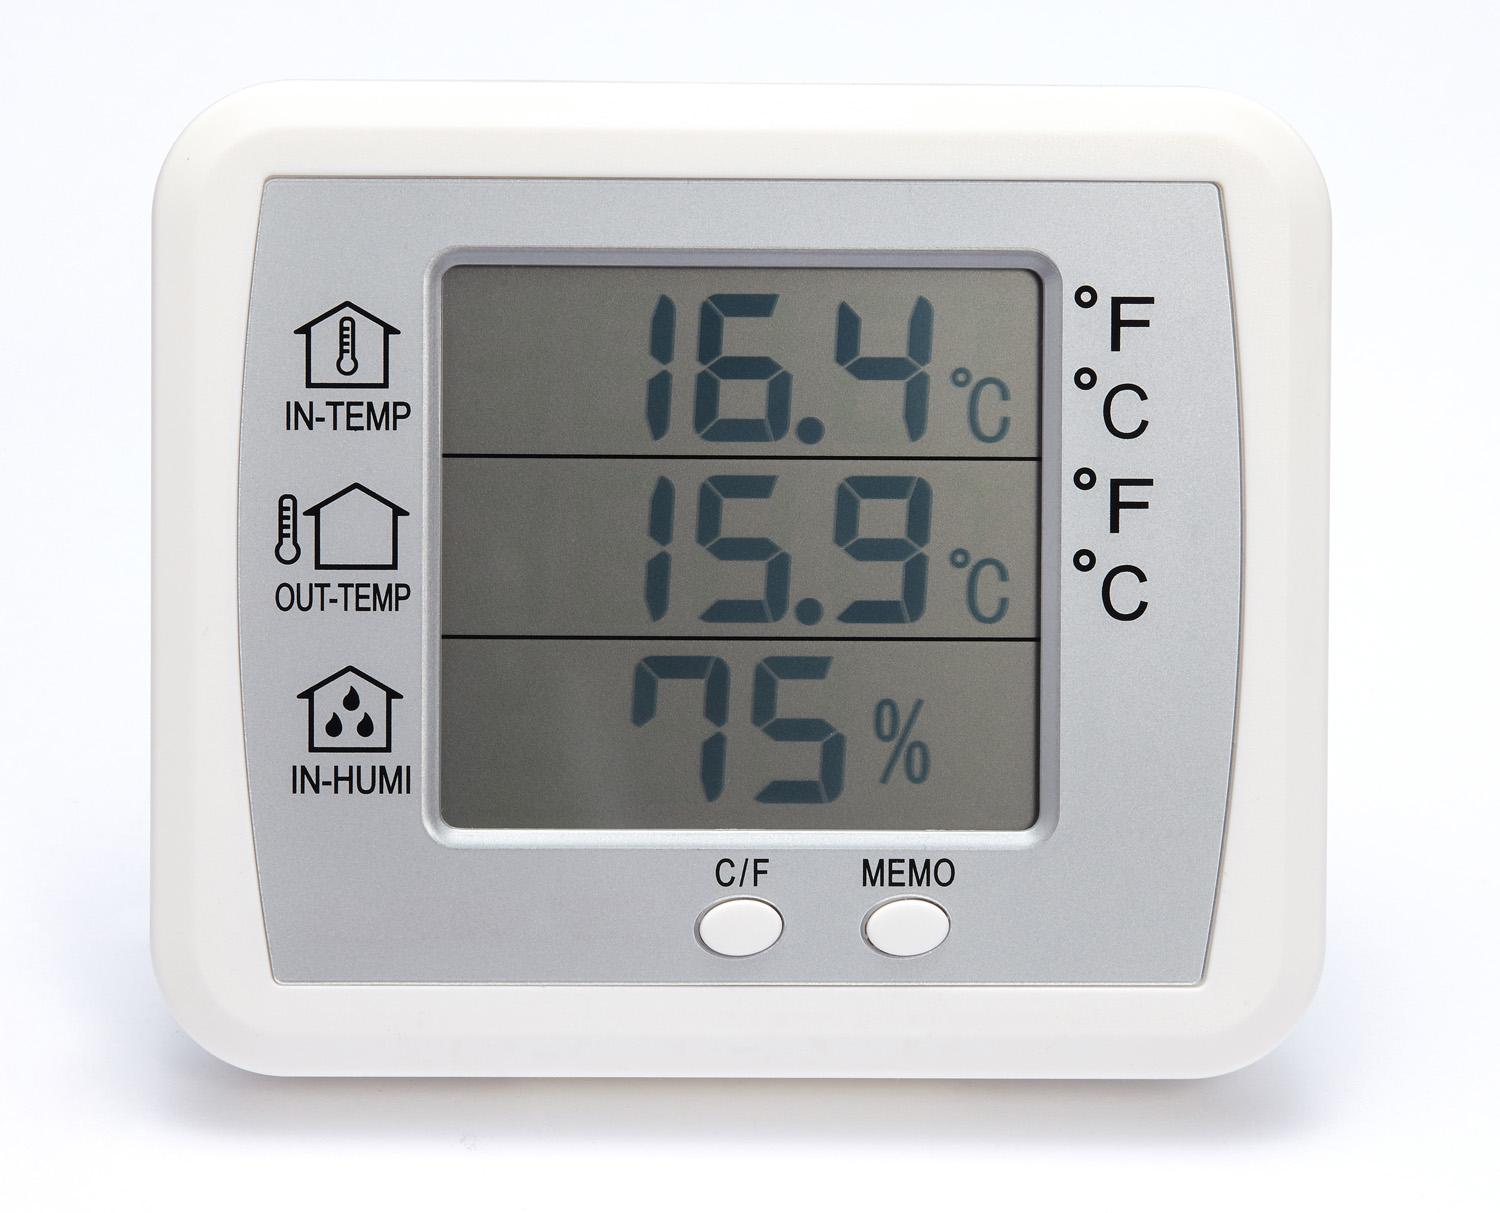
Generally, if the clarinet has been stored at normal room temperature (19ºC - 21ºC) with a normal level of humidity, you should be able play it without concern. However, a clarinet's tone and pitch can be susceptible to more extreme temperatures whilst condensation can often occur when playing in cold environments (which can disrupt the air channel within the clarinet). And, more seriously, wooden clarinet bodies can split and crack when exposed to extreme temperatures and sudden temperature & humidity changes.

To protect against complications from temperature and humidity:

  • Blow air through the clarinet prior to playing to warm it
  • Use the palm of your hand to warm the clarinet's body
  • Warm it gently and indirectly with a hand warmer or similar heat source, avoiding direct contact
  • In warmer climates and environments, keep your clarinet away from sources of cold air (such as air conditioning and cooling fans)

Thermometer & Hygrometer
 

Assembling the Clarinet

For ease of storage and cleaning, clarinets are assembled from (usually) five parts. The joins between each part use a layer of cork to make an air-tight seal, hence, a certain amount (but not an excessive amount) of effort is required to push the joints together.

Be careful not to damage the bridge keys and pad plates:

Yamaha Synthetic Cork Grease

  • Bb clarinets have one bridge key which spans both the upper and lower tubes
  • Alto and bass clarinets have two bridge keys (which span the upper and lower tubes) and a pad plate key which spans the lower tube and bell
  • When connecting these parts, press down the keys which lift the outer part of the bridge so that the lower part has clearance for assembly and positioning

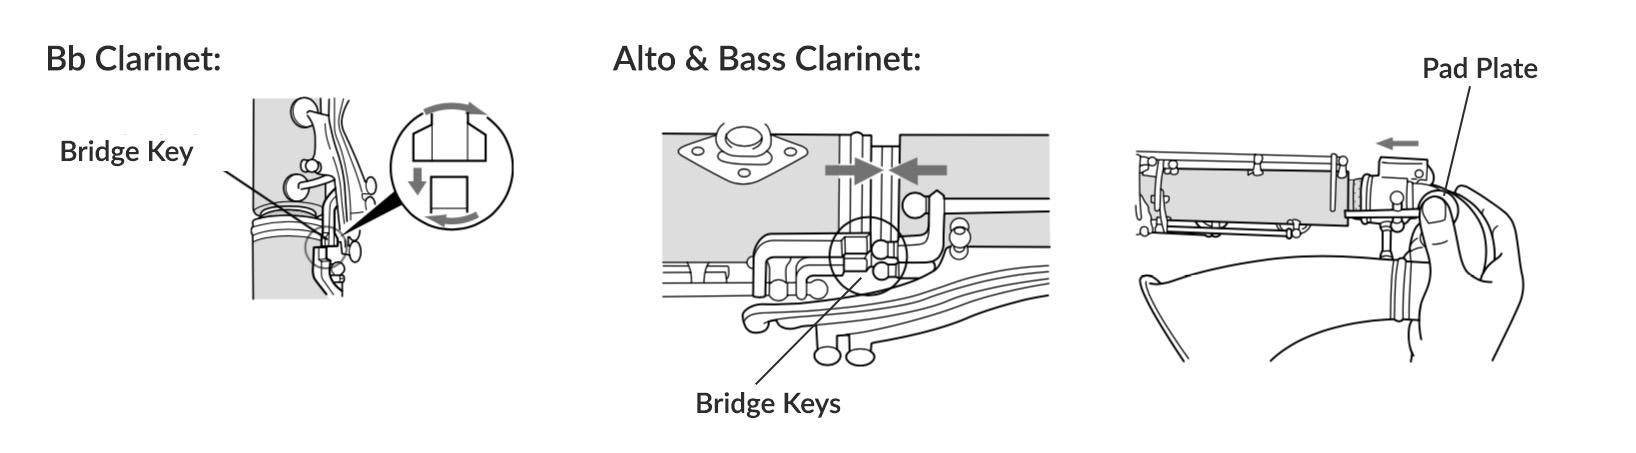
Occasionally - more so when the clarinet is new - the cork joints may not seem to fit the adjoining tube at all, preventing you from connecting the body parts. If this happens, apply a small amount of cork grease to the cork layer; this will reduce the cork's friction coefficient and allow you to assemble the clarinet.

  • Only use a small amount of cork grease - too much will reduce the friction to the point where the clarinet body parts won't stay attached
  • After playing and disassembling the clarinet, wipe the joins to remove any excess and un-absorbed cork grease; this stops the join collecting dust and protects the adhesive behind the cork
  • Only use cork grease when necessary; applying it too regularly can dissolve the adhesive behind the cork

Preparing the Mouthpiece

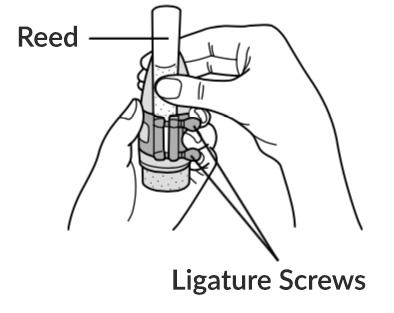
A ready-to-play mouthpiece is made up of three parts - the resin or ebonite mouthpiece itself, a wooden reed and a ligature which holds the mouthpiece and reed together. Once the clarinet body is assembled, put the clarinet reed into position:

  1. Take the reed from its holder or guard
  2. Place the flat side of the reed against the flat side of the mouthpiece; the thinner end of the reed should meet the thinner end of the mouthpiece
  3. The precise positioning of the reed is up to you - but usually the reed's tip would just cover or not quite cover the mouthpiece tip
  4. Using your fingers to hold the reed in position, slide the ligature onto the mouthpiece and over the reed, so that the ligature's adjustment screws are directly over the thicker part of the reed
  5. Tighten the ligature's screws to clamp the mouthpiece and reed together

The mouthpiece
 

After Practising & Performing

Regardless of whether your clarinet is made from tonewood or ABS resin, it's essential to remove moisture from all parts of the instrument - including the main air channel, the reed and from the pads on the underside of the keys. Before doing so, fully disassemble the clarinet (including the mouthpiece and reed).

Storing the Reed

Whilst excess water and saliva should be wiped off the reed after use, it's important not to let the reed dry out. Removing it from the mouthpiece and storing it in a reed guard should be sufficient, but take care not to let the reed's tip or vamp become damaged by the guard.

With regular practising and performing, a reed may only last for a fortnight before it starts to degrade and needs replacing. Keep spare reeds to hand, and make sure you're breaking in a new reed whilst using an already-broken in reed.

Removing Moisture from the Clarinet's Body


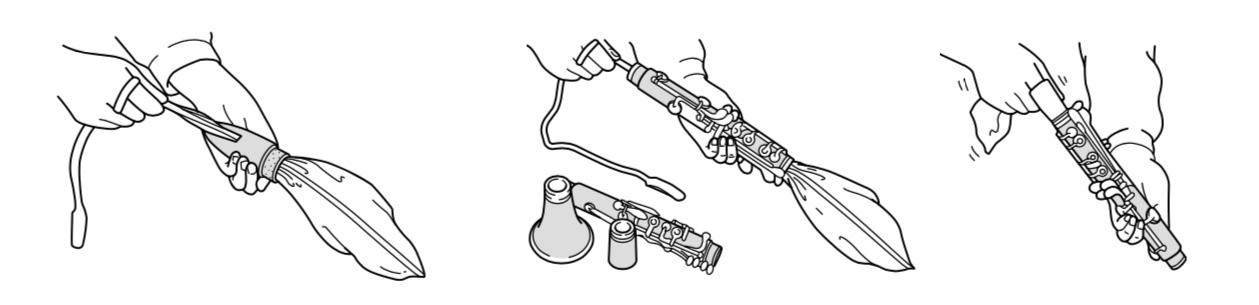
The main air channel that passes through the clarinet's body is where most moisture collects - it's important to remove it.

You'll need:

  • Cleaning Swab (medium for most clarinets; large for bass clarinets)
  • Polishing Gauze

Follow these easy steps:

Diagrams showing the use of a cleaning swab and polishing gauze to remove moisture from the flute's bore

  1. Drop the swab's feeder cord through the widest end of the body section
  2. Gently and slowly, use the feeder cord to pull the swab fully through the barrel, upper tube, lower tube or bell; pull the swab only partially through the mouthpiece (with reed already removed)
  3. If the swab appears to get caught on anything, slow down and if necessary, gently pull the swab back out
  4. Repeat to collect all excess moisture
  5. Wipe around each joint using polishing cloth to remove moisture and grease from the joint and cork
  6. Repeat steps 1 to 5 for each body section


Removing Moisture from the Clarinet's Key Pads

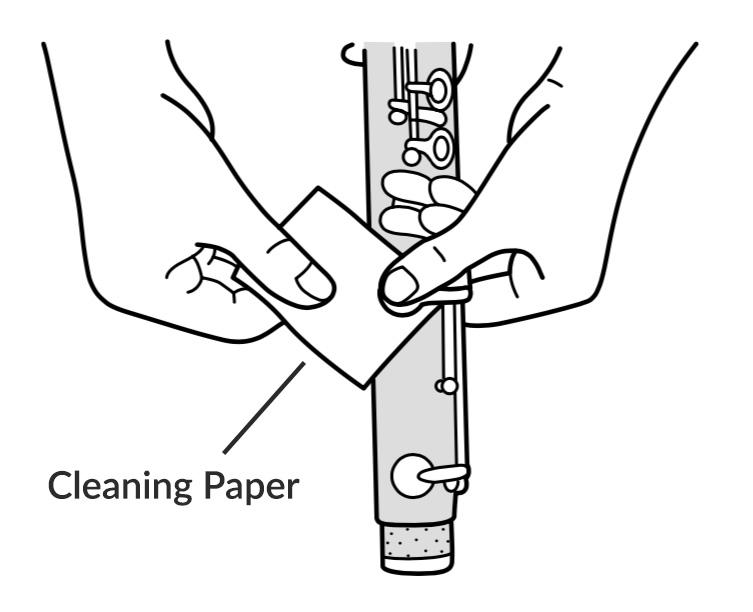
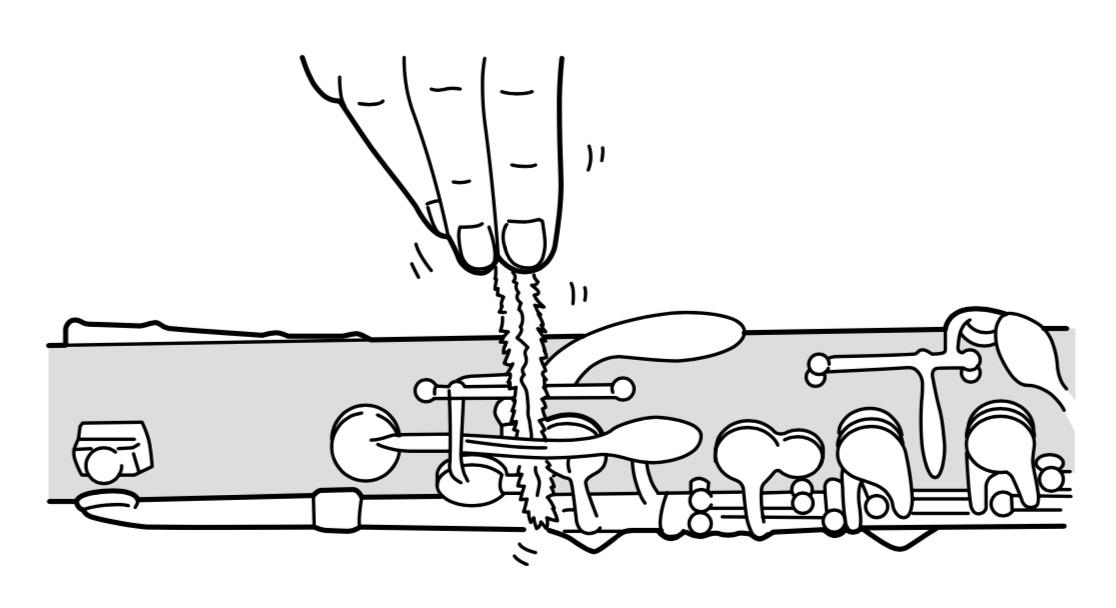
Moisture can also collect on the pads underneath the keys - particularly covered keys (those which are a single flat surface without a hole. It's important to remove this moisture to stop the pads from deteriorating.

You'll need:

  • Cleaning Paper
  • Powder Paper

Follow these easy steps:

  1. Place cleaning paper between the pad and the tone hole
  2. Hold the paper firmly in position
  3. Lightly and slowly press down the key so that the pad under the key makes contact with the paper
  4. Keep the key pressed for a few seconds so the paper can absorb moisture from the pad
  5. Remove the paper only when the key isn't pressed down
  6. Repeat 2 to 3 times, using different areas of the paper
  7. If the pads seem to be at all sticky (after moisture has been removed):
    • Take a clean sheet of powder paper from the packet
    • Dab the surface of the pad several times with the powder paper

Using Cleaning Paper and Powder Paper to remove moisture and stickiness from a clarinet
 

Monthly Maintenance

Whilst there's no need for a full service every day, we recommend giving your clarinet some extra attention at least once a month:


Cleaning the Tone Holes:

What you'll need:

  • Tone Hole Cleaners

Follow these easy steps:

  1. Hold the clarinet by its body, taking care not to hold it by any of the keys
  2. Using a tone hole cleaner, remove any dirt or dust from the tone holes and from the spaces between the keys, pads and body
  3. Take care not to bend any keys, arms or levers

Removing dirt and residue from clarinet tone holes
 

Cleaning the Clarinet's Keys


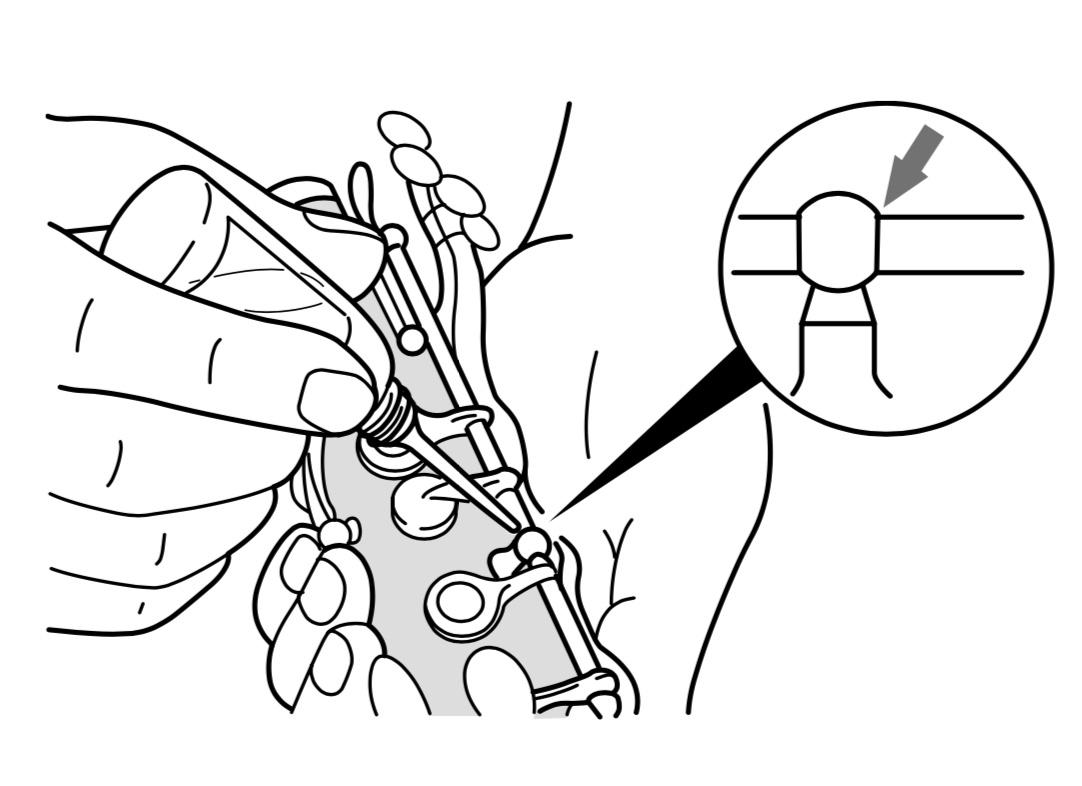
The keys on the clarinet have been precisely designed and engineered to allow control over pitch and tone when you play. But as with any mechanism, it's important to check they're in good working order.

What you'll need:

  • Small electrical screwdriver set
  • Instrument key oil
  • Clean, lint-free cloth

Follow these easy steps:

  1. Using an appropriate small screwdriver, gently check the screws are tight for each key lever and arm
  2. Look out for any which show signs of discolouration or disfigurement and replace if possible
  3. Apply a small amount of key oil to the moving parts of the keys
  4. Be careful not to use too much oil
  5. After applying, press down each keys to allow the oil to spread into the lever mechanism
  6. Wipe off any excess oil from the surface of the body, joints or keys

Using Key Oil on a Clarinet
 

Yearly Servicing

During a full service, a clarinet is completely disassembled and thoroughly cleaned - giving the opportunity for any damage or wear to be discovered and addressed.

Assuming normal daily and monthly care is given to your clarinet, we'd recommend having your clarinet serviced by a qualified clarinet technician once every year.