

Most musical instruments require and benefit from regular care maintenance; look after your instrument and you'll be rewarded with optimal response and performance each time you practise or perform.
The trumpet is no exception. Carefully crafted from brass, the trumpet has a cluster of valves to precisely control the air moving within the body. Here's an easy guide to looking after your trumpet, followed by some recommended essentials to help you.
Contents:
Most trumpet students begin to learn using a Bb trumpet which has various sections, although usually only the mouthpiece and slides physically detach:

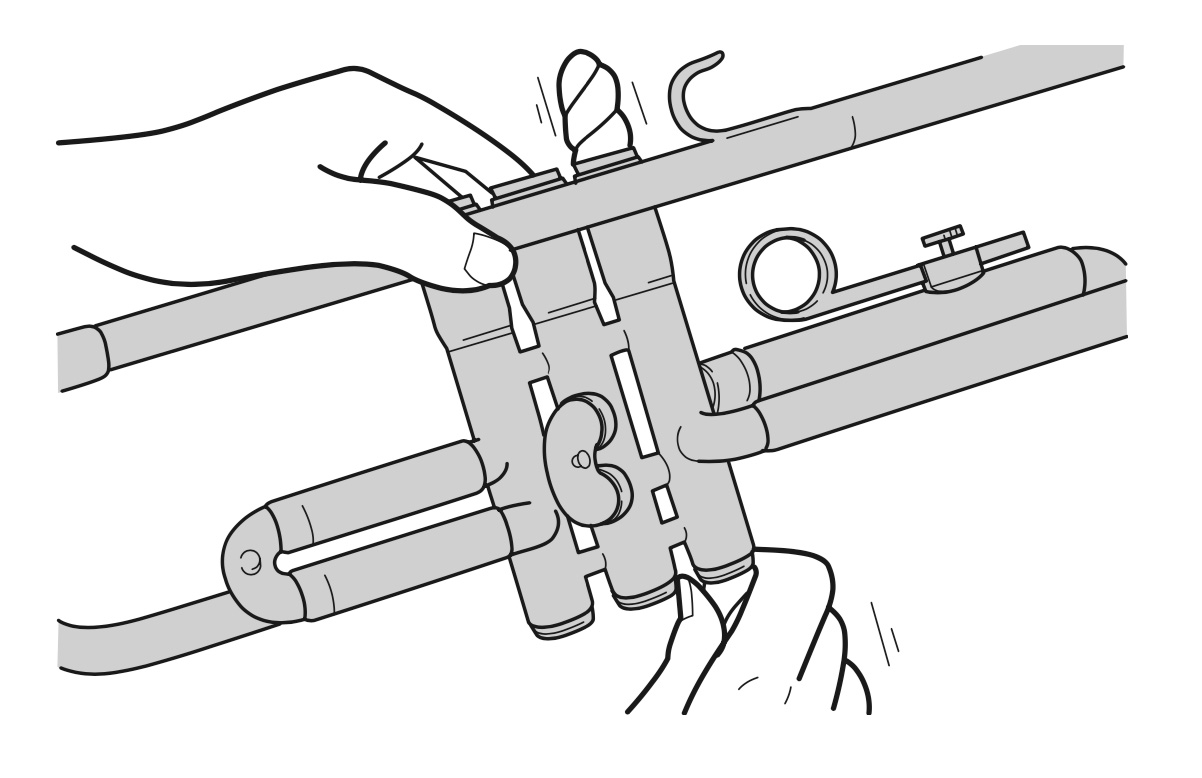
Remove each slide carefully while holding down the corresponding piston, as shown in the diagram. A popping sound indicates that you are not removing the slide properly. Extract the moisture from the slide which you have removed. Remove the moisture from the body of the trumpet as well, via the water key.
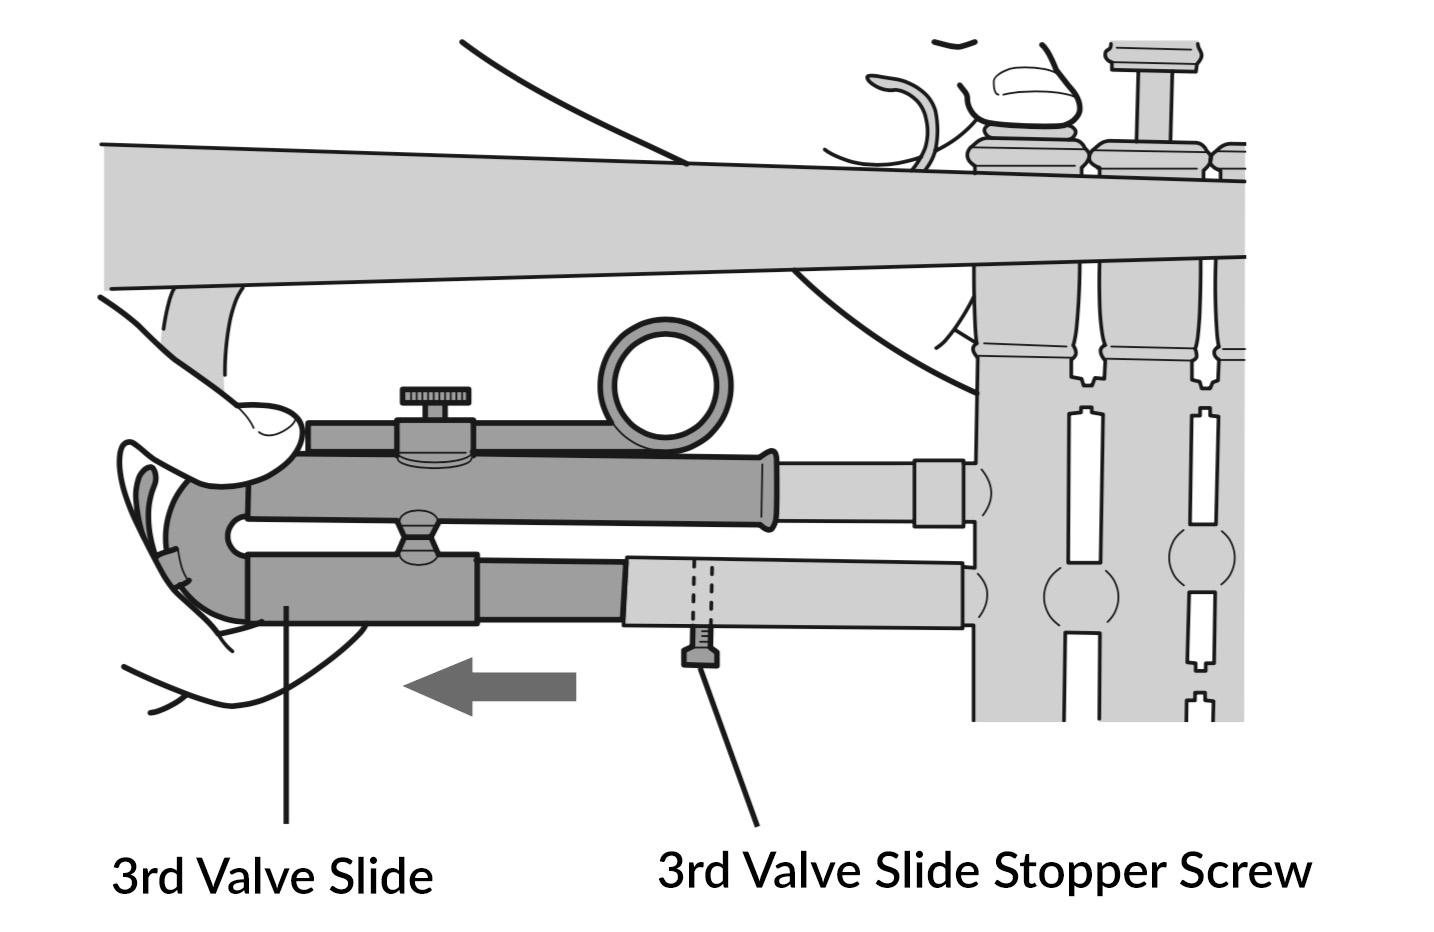

Although brass and nickel-silver-the materials which are used for slides-are extremely resistant to corrosion, there is a danger of progressive corrosion if moisture remains in a slide for a long time. When removing a slide, be careful to hold down the corresponding piston.
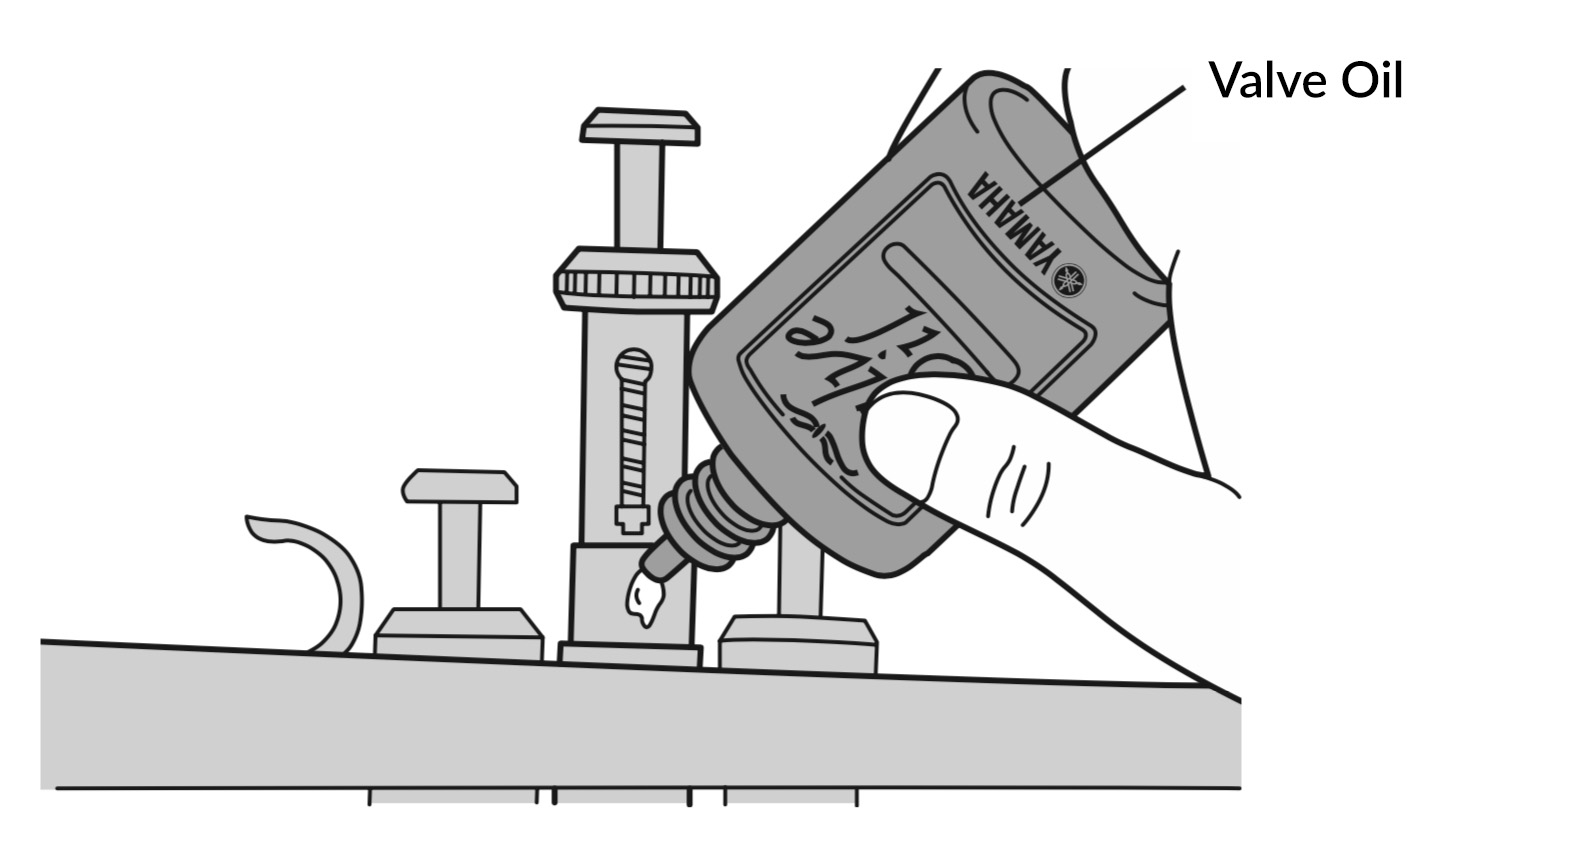
Undo the cap screw in the valve casing and slowly extract the piston upwards halfway, without allowing it to rotate. Now apply two or three drops of piston oil to the piston. Retighten the cap screw and move the piston up and down two or three times to work in the oil.
Valves can become sticky if not properly lubricated, so be sure to clean and oil them regularly.
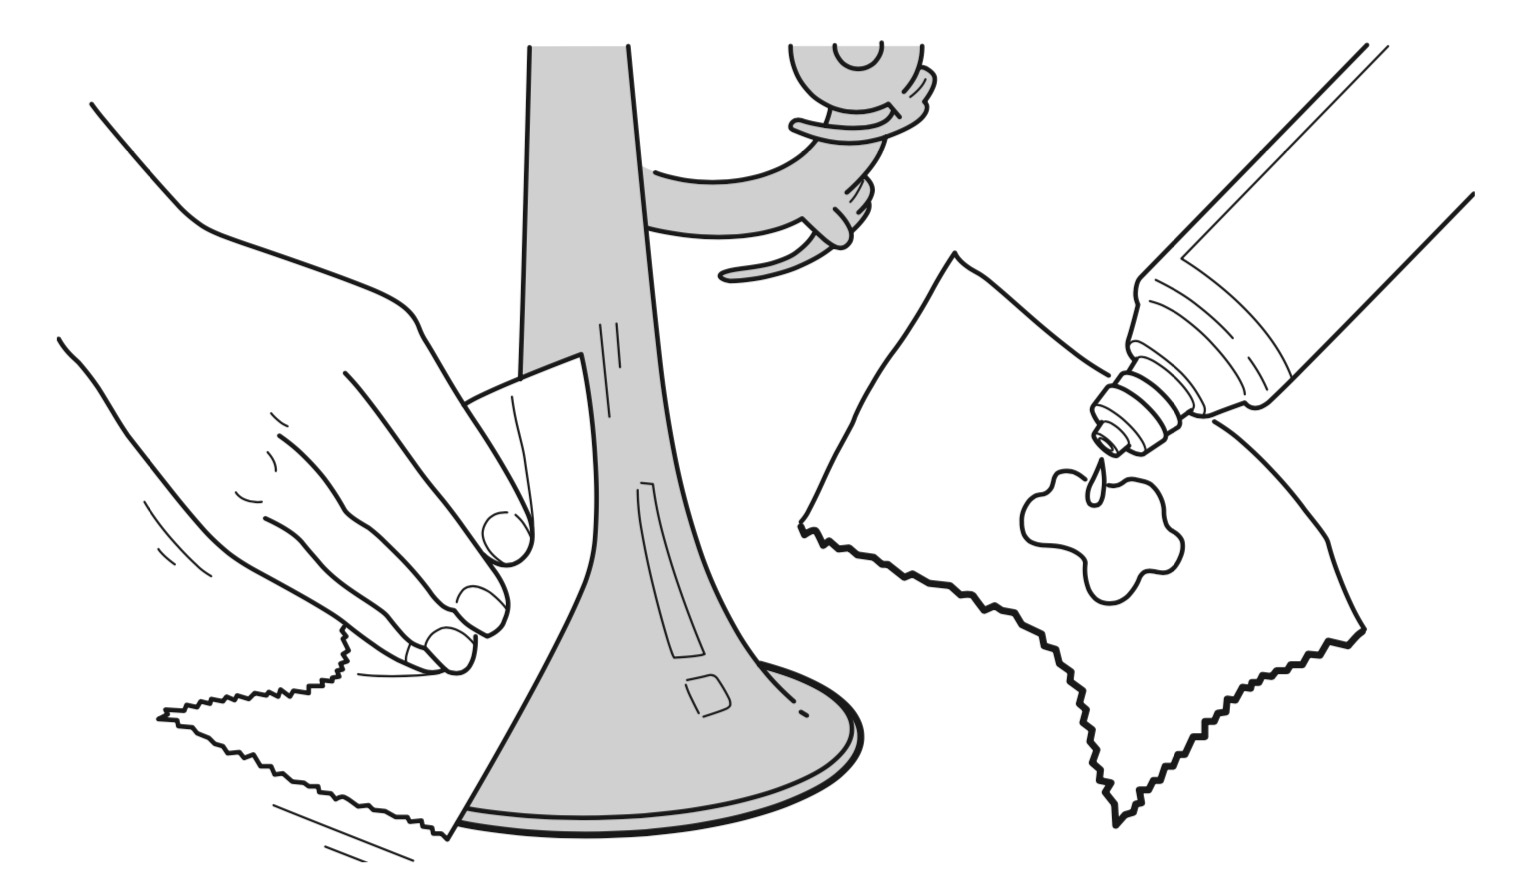
Before replacing the instrument in its case, wipe its surface lightly with a polishing cloth to remove dirt.
Trumpets finished with silver plating will darken even if polished meticulously every day. This is caused by a natural reaction between the silver metal and the sulphur content and oxygen in air and perspiration. However, the nature of this silver tarnish differs from that of iron and other metals, forming a thin film that contributes to protecting the surface of the instrument, so is not a cause for concern. On the contrary, there are some musicians who believe a discolored instrument produces a better sound because of the hardening effect.
If a clean finish is preferred for visual or aesthetic reasons, it would be best to shine the instrument with an abrasive such as silver polish. It is also possible to use a cloth that has been soaked in silver polish, known as a "silver cloth". When using silver polish, polish lightly by applying a small amount to a cloth and spreading thinly over the instrument.
Carefully remove the slides and wrap a polishing gauze around a cleaning rod so that the metallic part of the cleaning rod's tip is not exposed. Now proceed as follows:

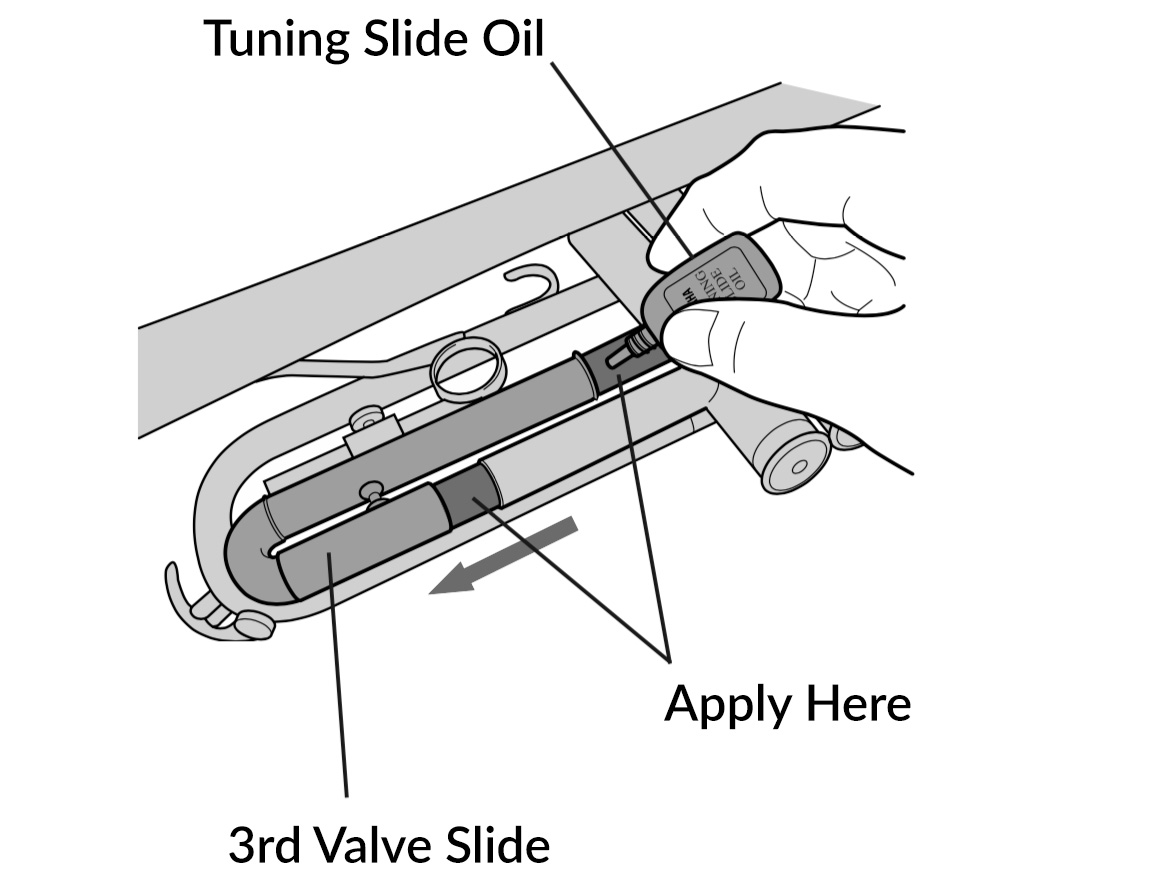
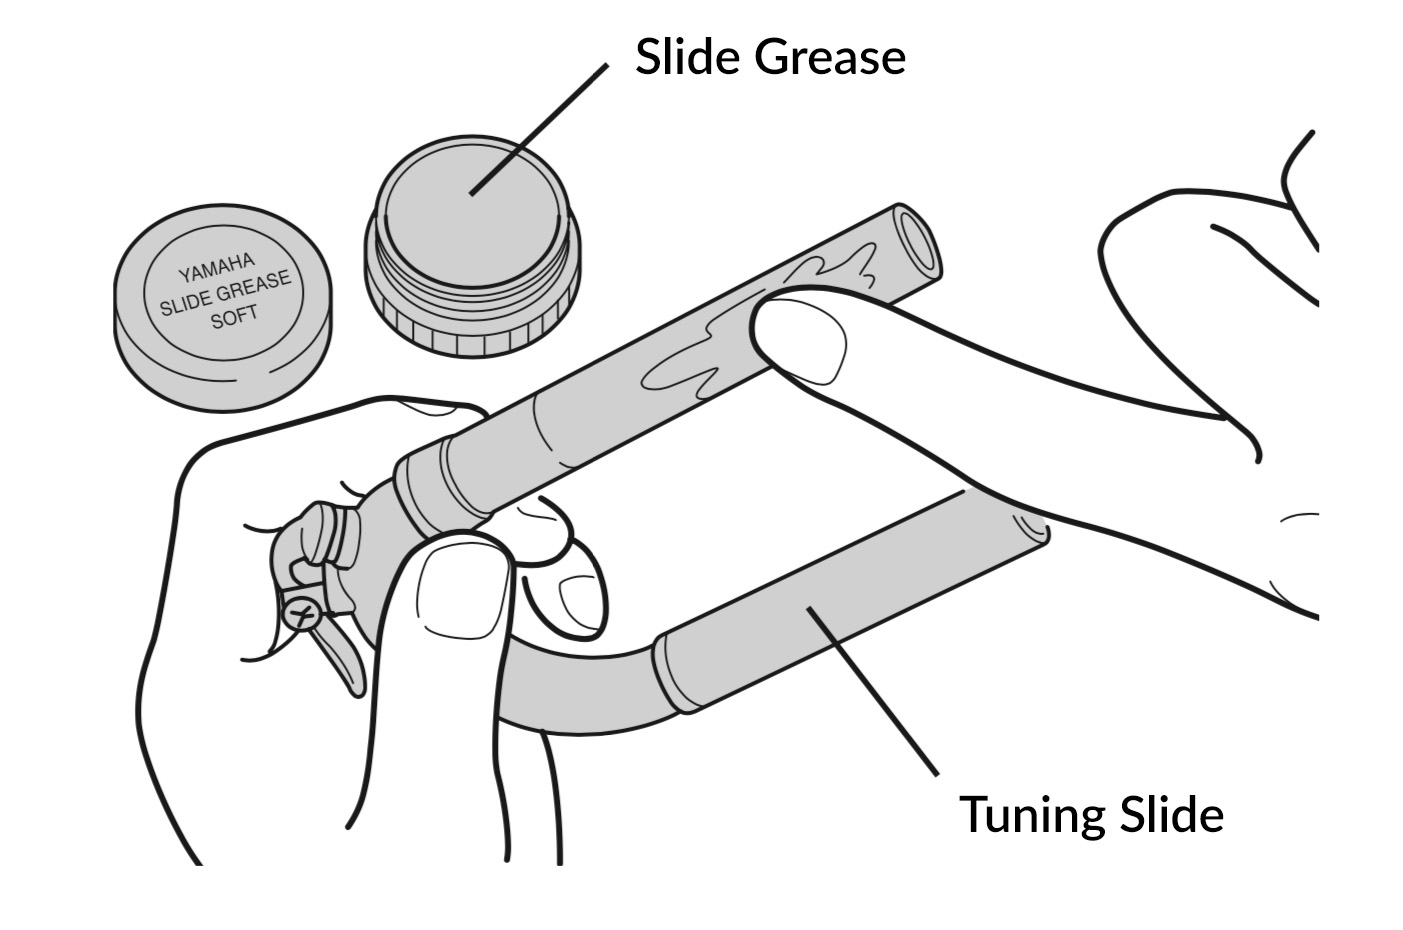
Apply slide grease to the main tuning slide and the second valve slide, and tuning slide oil to the first and third valve slide. Oil is applied to allow smooth movement while playing, so that the first and third valve slides can be used to control pitch. If grease, such as that used on the main tuning slide and second valve slide, is applied to these components, it will be more difficult to achieve a smooth movement. On the other hand, because movement of the main tuning slide and second valve slide during play is undesirable, tuning slide oil is not used on these parts. This is the reason grease and oil are used differently.
Make up a solution of brass soap, consisting of 10-15 parts warm water (30°C-40°C) to one part brass soap. Soak a mouthpiece brush in the brass soap solution and clean the mouthpiece by pushing the brush through the throat. Now use clean water to wash off the mouthpiece.

Twist a polishing gauze into a thin strand and use it to carefully clean the intricate parts of the instrument.
Use a tone-hole cleaner to remove dirt from the water-key hole.

Make up a solution of brass soap, consisting of 10-15 parts warm water (30°C-40°C) to one part brass soap.


After cleaning your instrument you should use one type of valve oil until the next time you clean the instrument. When changing valve oil types, washing away or wiping off any old oil from within the piston and the valve casing will allow the most to be made of the new oil’s properties. Depending on the oils, mixing oils together may cause stickiness and prevent the true benefits of the oil from being obtained. This is also true for products from the same company. For example, Yamaha Valve Oil and Yamaha Valve Oil Light feature the same basic ingredients but differ in the small amounts of additives, etc. used. If possible, we recommend that you wipe off old oil and clean the instrument before using different oil.
Water key cork becomes soft due to water absorption with extended use. Left as-is, the cork will become damaged so that the key is unable to fulfil its role, so it’s best to replace it. You can purchase cork as a standalone product at musical instrument stores. Simply use quick-setting adhesive to attach cork to water keys.